Saturday, October 21, 2006

It's Alive! It's Alive!! IT'S ALIVE!!!

Well, well, well. I had the intestinal fortitude to try and get the Super Ten running.

So far, I have taken care of just about everything else. I tried to put it off as long as I could, but no more.

I bagan by putting gas into the tank and pumping it, using the petrol pump, until it reached the carb. I filled the radiator with anti-freeze and water, checked the oil and gave it a few turns by hand to get the oil circulating. I double checked the rotor in the distributor to make sure that the timing was right.

There was no putting it off any longer... I turned on the ignition and pulled the starter knob.

Nothing.

A sputter once and a while, but essentially, nothing.

With a ready made spare parts supply, namely the Roadster, I then went about swapping parts:

- the carb... nothing.
- The distributor & coil... nothing.
- The spark plugs... nothing.

Ok, enough. Time to try something else.

At this time I pulled out plugs and got out the compression tester. 1st cylinder was a respectible 125 psi. So far so good. 2nd cylinder was 30 psi. Whaaaat!! 3rd cylinder was at 0 (zero). YIKES!!! 4th cylinder was at 0 (zero) WOAH!

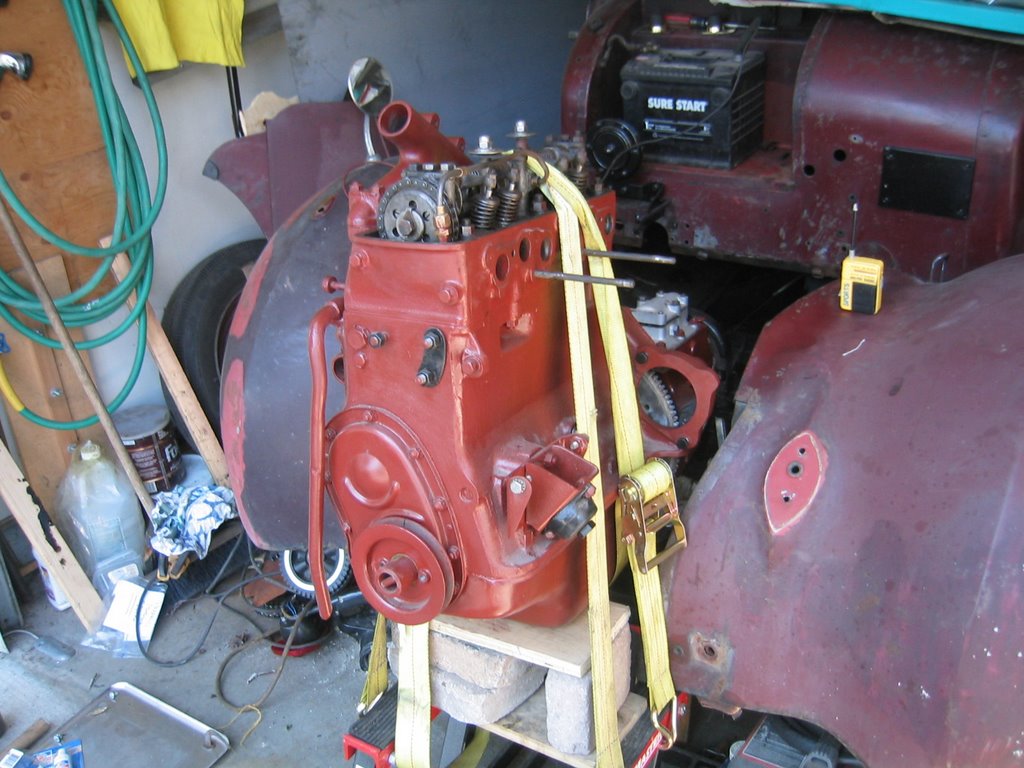
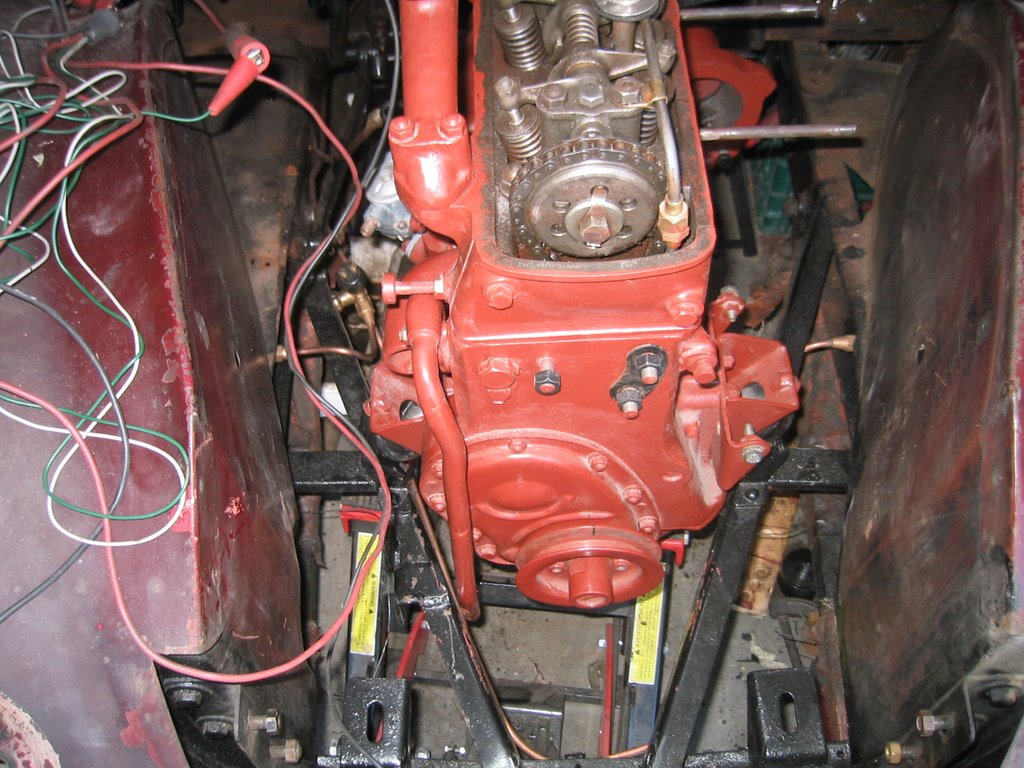
Obviously there was a MAJOR malfunction here, but what? I went over the photos that I took during the rebuild to check if the cam was off, nope. I also verified this too by popping off the valve cover. With little to no compression in three of the cylinders I thought that it was either a huge break in the head gasket (but how), an unseen hole in the three cylinder walls (not likely since I would have seen them), the valves were sticking open (how could that happen unless there was debris in the cylinders).

I decided against removing the head right away. Instead, I thought that I would re-gap the valves and try again. .004 for the inlet and .006 for the exhaust (for timing). With that done, I tried the compression again. 125 again in the 1st cylinder. No surprise here. 120, 130 and 125 respectively for 2, 3 & 4.

Go figure that something as simple as a valve clearance gap would make such a mess of things.

With the plugs back in and the ignition on cranked the engine over with the starter.

VROOOM!

Started up right away. An adjustment here and there and she was purring like a kitten. I couldn't help myself and took the car for a spin around the block. Glorious.

That is not to say that there are not a few bugs to work out. I still have a leak in the rad, and the steering is slack, but the car starts and that is a HUGE hurdle.

Friday, October 06, 2006

Baby needs a new pair of shoes!

With a "new" set of brake shoes now in my possession, it was time to get them installed. First of all they spent a few minutes in the blasting cabinet to get off the surface (and non-surface) rust that had built up on them. This was probably due to their being just recently dredged from the bottom of the ocean where a sea turtle misplaced them during their long round-the-world tour from the UK to Canada (via Japan).

A misting of paint, and voila! Ready to install.

With the Ten back in the garage, thanks to the pushing skills of the family and a few neighbourhood kids, I was able to install one side so far. A bit of shuffling to get the other side done, and then some brake fluid and parking brake adjustments. I almost have no excuses to get the engine started.

Tuesday, October 03, 2006

I am finally getting a brake

Well look what the cat/postie dragged in... A full set of brakes!!

More than 2 months in transit from the UK to me in Canada. Finally, I can stop using blocks to keep the 10 in place and test out the master and brake cylinder overhauls.

I guess that the only thing left to do after that is to get the engine started. That is the part that scares me!

Tuesday, August 29, 2006

Carpet Capers... for the Ten and the Roadster??

I do not know why I waited, but after having the Super Ten here for a couple of months (and still no brakes) I finally checked out the last unopened bag that was stowed in the boot. I knew that there were bits and pieces of carpet, but I had other things to work on first. Well was I surprised! The bag contained the full carpet for the Super Ten. Well worn but certainly a great pattern for a replacement set AND perhaps some insite into how the Roadster carpet was made. Both cars were produced in the same time period and the Super Ten carpeting is original so chances are that they would be similar.

A couple of things to note are:
  • the carpeting itself is rather thin, but there is a rough matting that looks like it went underneath
  • the gearbox cover is not the rubber type found on the roadster
  • the carpet over the prop shaft is glued in place
  • the rubber mat is clipped to the carpet

Wednesday, August 09, 2006

A boost of energy, mine and for the car!

Was it the cool night breeze or the sudden fear that show dates are fast approaching, either way I got cracking with getting things off the workbench and on the Ten.

With my super human strength and the help from a floor jack (mostly the jack) I managed to manueuvre the nearly complete engine into its resting place. With the engine mounted and secured on the jack, it was a simple process. Simple like a fox! The engine was raised up off the jack so that when raised the engine could be slid off onto the front crossmember, back onto the jack and lowered into place!

So simple a cave man could do it (sorry Geiko). Actually, it pretty much went as planned. Sure I managed to scratch the paint on th eengine a bit, but nothing a dab here or there could not manage to correct.


I have always found the front engine mounts a pain to get in line. This time I lined up one side, and using the end of the gearbox as a lever was able to get the other in place. All that was left to secure the engine was to get the gearbox mount bolted down, which I did.

The next step will be to attach the ancilliaries, drop some oil in the pan, crank her by hand a few times to get the oil flowing, a spot of pertol and, with luck, a puff of bluish smoke will signify that it is alive... IT'S ALIVE. Well I hope so anyway.

Friday, July 28, 2006

Despite the pause, things are progressing

This "pause" due to my brake issues has not stopped me from continuing work on the Ten, although by the amount of postings on this blog, one would think otherwise.

A few items that I have taken care of since finding a source for the brakes are:

RING GEAR -

I had two flywheels and ring gear. Problem was that the flywheel on one had a nasty ring gear, and the ring gear on the other had a nasty fly wheel. Simple to solve? Well sort of. I managed to tap off the ring gear from their respective flywheels. One had been welded to the flywheel (the nasty one) and lucky for me(?) the welds had broken. A quick cleanup with a wire brush and I was ready to put the good gear on the good wheel.

Not having a oxy-acetylene torch, I used the next best thing... my back yard bar-b-q. I prepared myself beforehand, vice grips, oven mits AND gloves as well as a fire extinguisher... just in case. I did have my flywheel stored in the freezer for a few days prior to the operation in hopes that freezing would shrink it enough to help ease on the ring gear. Fired up and left for a few minutes at 600 degrees (that is hot), I prepared the flywheel on a paving stone to protect the patio from any potential damage. BBQ open, vice grips attached to the outer edge and voila! The gear slipped on effortlessly. There was a bit of a gap that remained, and I was worried that the two flywheels were different diameters (you never know). This concern was slowly put to rest as the heated gear and frozen wheel began to return to their original sizes. The real test will be when I try to start the car...

WIRING -

I was going to save myself time by using the existing wiring. My initial inspections showed little deterioration, so rewiring could wait... until I removed a bracket that held in the wire loom for the
headlamps. There I saw that the friction between the bracket and the wires had caused the cotton and rubber wire sheathing to deteriorate to the point that bare wire was visible. OK, I removed the entire harness, measured, bought new wire and will make an new harness. This has not yet been done, but is on the short list.

TOE & FLOOR BOARDS -

As I will be installing a "new" engine and gearbox, I took a look at the floorboards in the front compartment of the car. Not bad, however some delamination. Well the car is not going anywhere, so with some plywood in hand, a new set were made. I combined the top and bottom toe boards. This does make the installation and removal a bit more complicated, but it is possible. New felt was glued to the edges (rather than tacked on as on the originals). I was going to replace the metal straps that run underneath, but they cleaned up so nicely, I decided to keep them.


INSTRUMENTS -

With the wiring now out, I also removed the dash. A pretty stamped metal affair painted up to look like wood! The instruments look to be in pretty good shape. I just gave them a cleaning and touched up some of the tan paint on the edges of the multi-gauge. A fresh coat of medium brown on the bezles and that was done. The rest of the knobs, lights and switches were cleaned up.

STEERING -

With the engine compartment empty, why not take out the steering column? This too receive a good cleaning and a fresh coat of paint. Originally, the box too was black, but the chance to have a touch of alloy in the compartment prompted me to leave it "au naturel".

A long post for a long pause...

More in the near future.


Friday, July 21, 2006

The Brakes are Back

Good news is on the horizon! I have found a supplier for a new set of brake shoes. Step one was to find out that the shoes on the Super Ten are identical to those on the Morris Eight (39-48). Then the scope of the search widened enough to have a shop reply with the chance of having some. I had contacted the Morris Spares group and although they show up in their catalogue, I have not heard back from them. I did hear from Wyvern Brake Supplies in the UK. After suplying a photo of the Super Ten & Morris brakes (from a local HACK club member who has a pre-war Morris) to confirm that they are the same, I was given a quote.

98 pounds (including shipping! Quite reasonable I thought. Even the Morris Spares prices from the catalogue were almost twice that.

I mailed off the money order today, so I will update the blog when they arrive.